
Installation
- Extract the ZIP and open the folder.
-
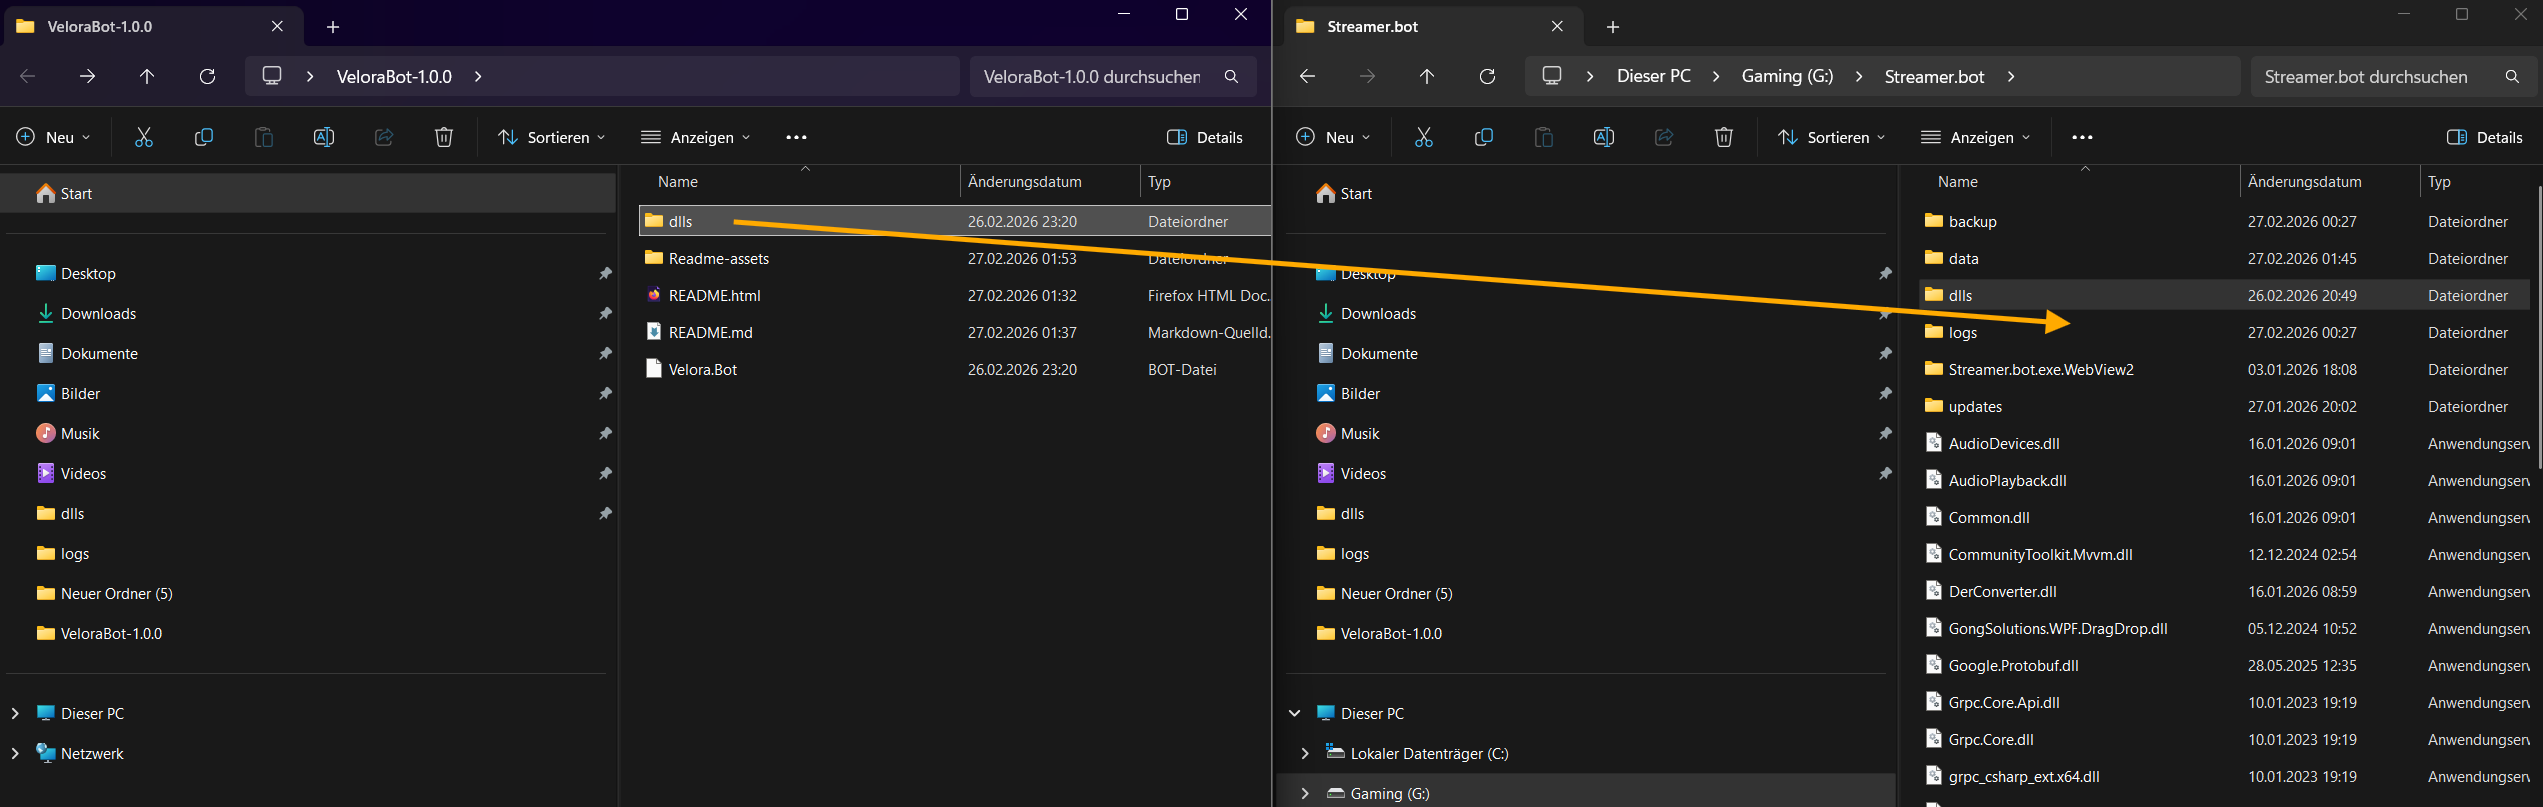
Move the dlls folder into your Streamer.bot installation directory OR open dlls and copy its contents into Streamer.bot/dlls.
- Start Streamer.bot v1.0.4.
-
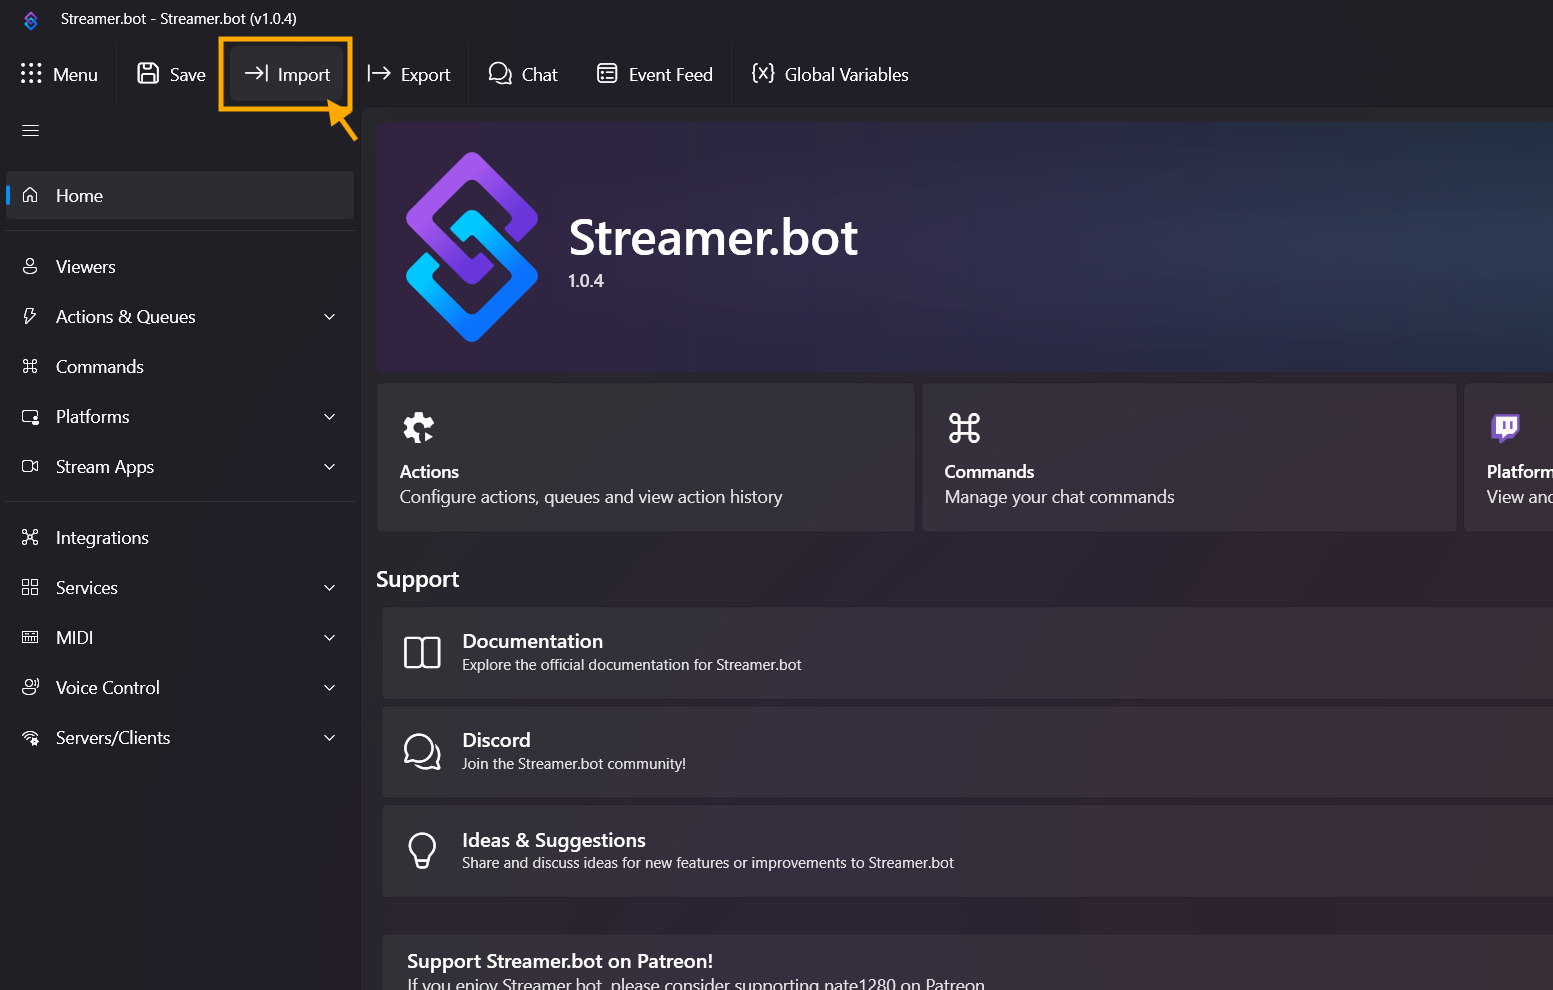
Click Import.
-
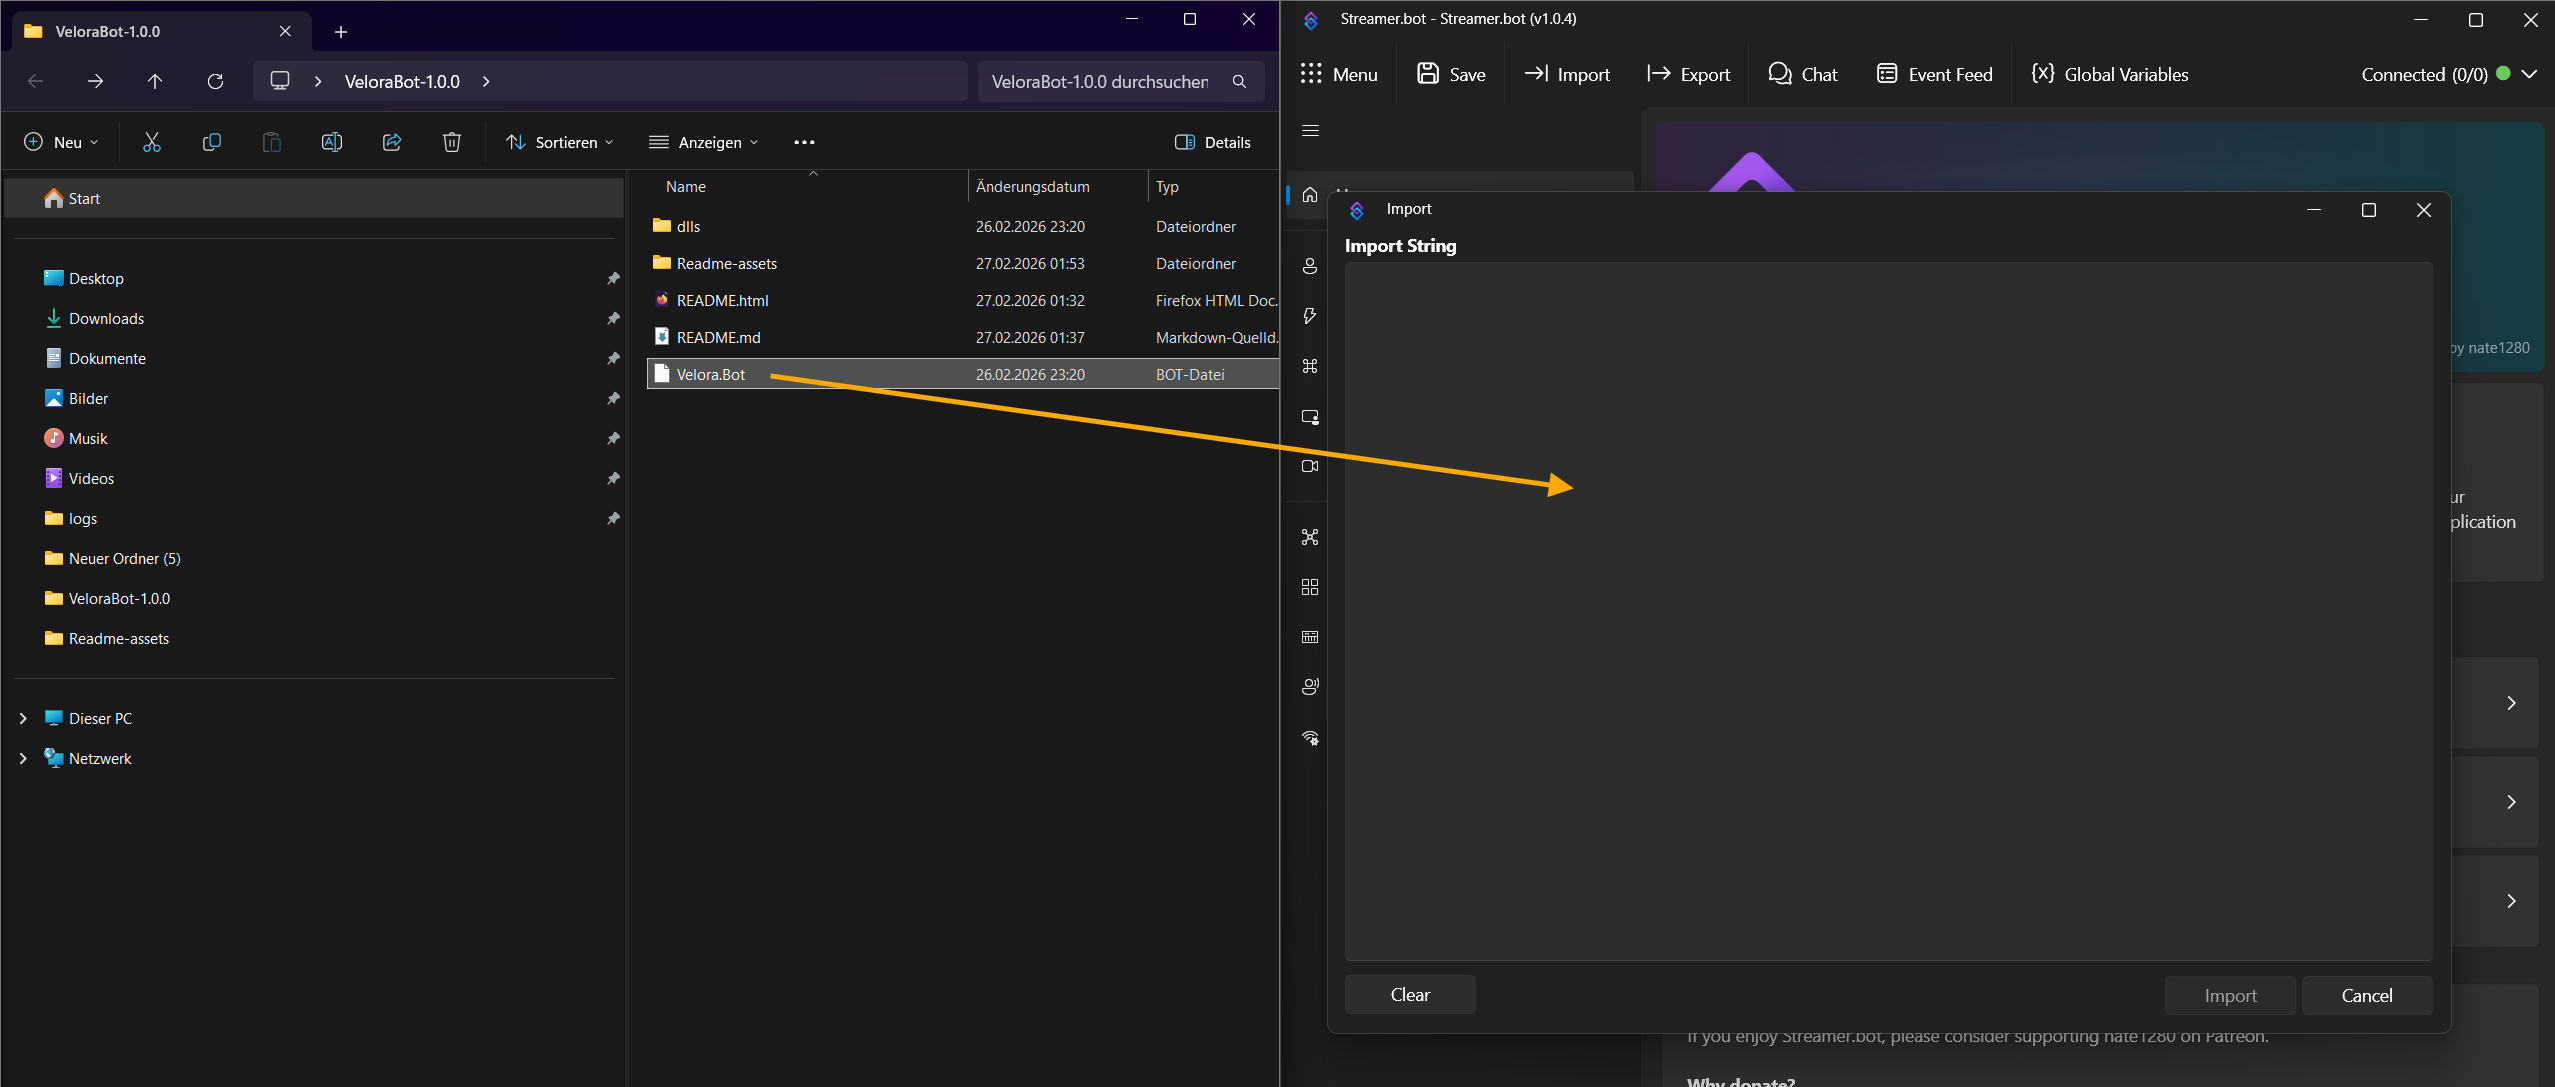
Drag and drop the Velora.Bot file into the new window.
-
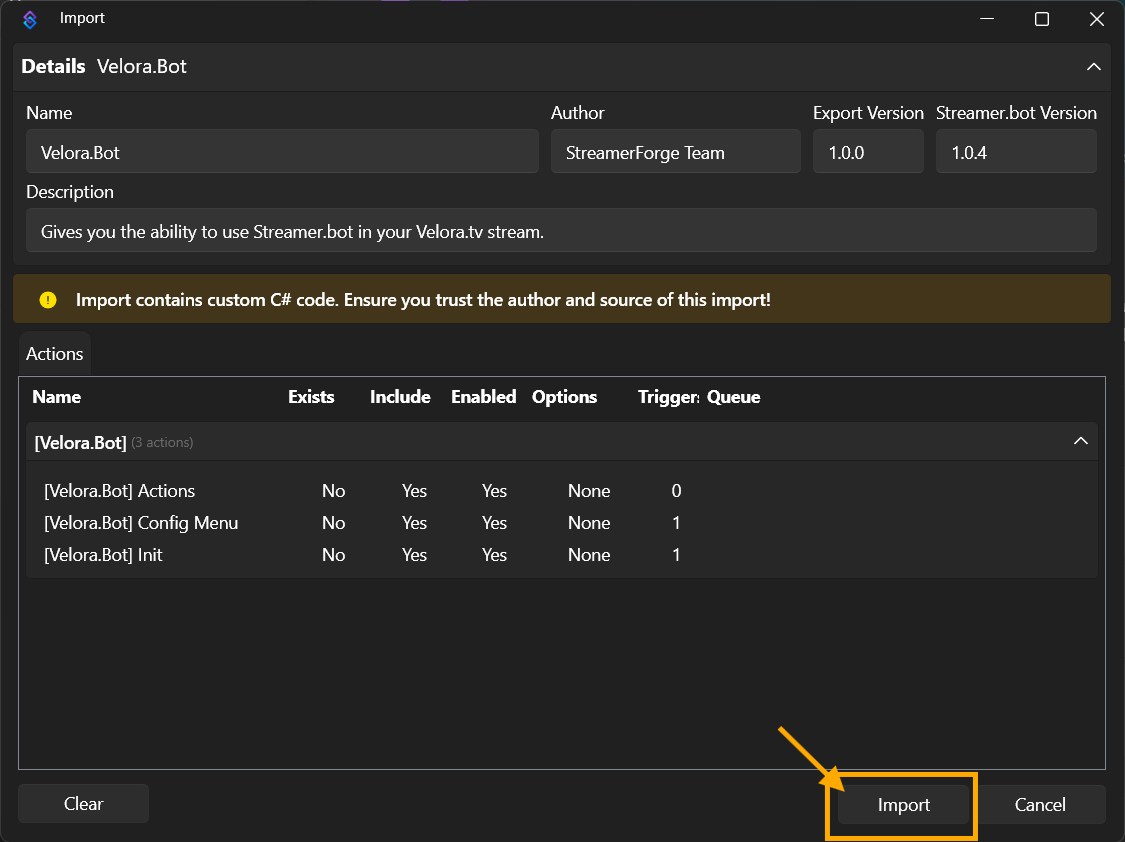
Click Import.
- Close and restart Streamer.bot.
-
After about 5 to 10 seconds, the Velora.Bot UI should open.
If the UI does not open, go to the dlls folder in the Streamer.bot installation path and locate Velora.Bot.dll. Right-click -> Properties and at the bottom under Security enable Allow and confirm with OK. Repeat the same for Velora.Bot.pdb. Then restart Streamer.bot.
First Configuration
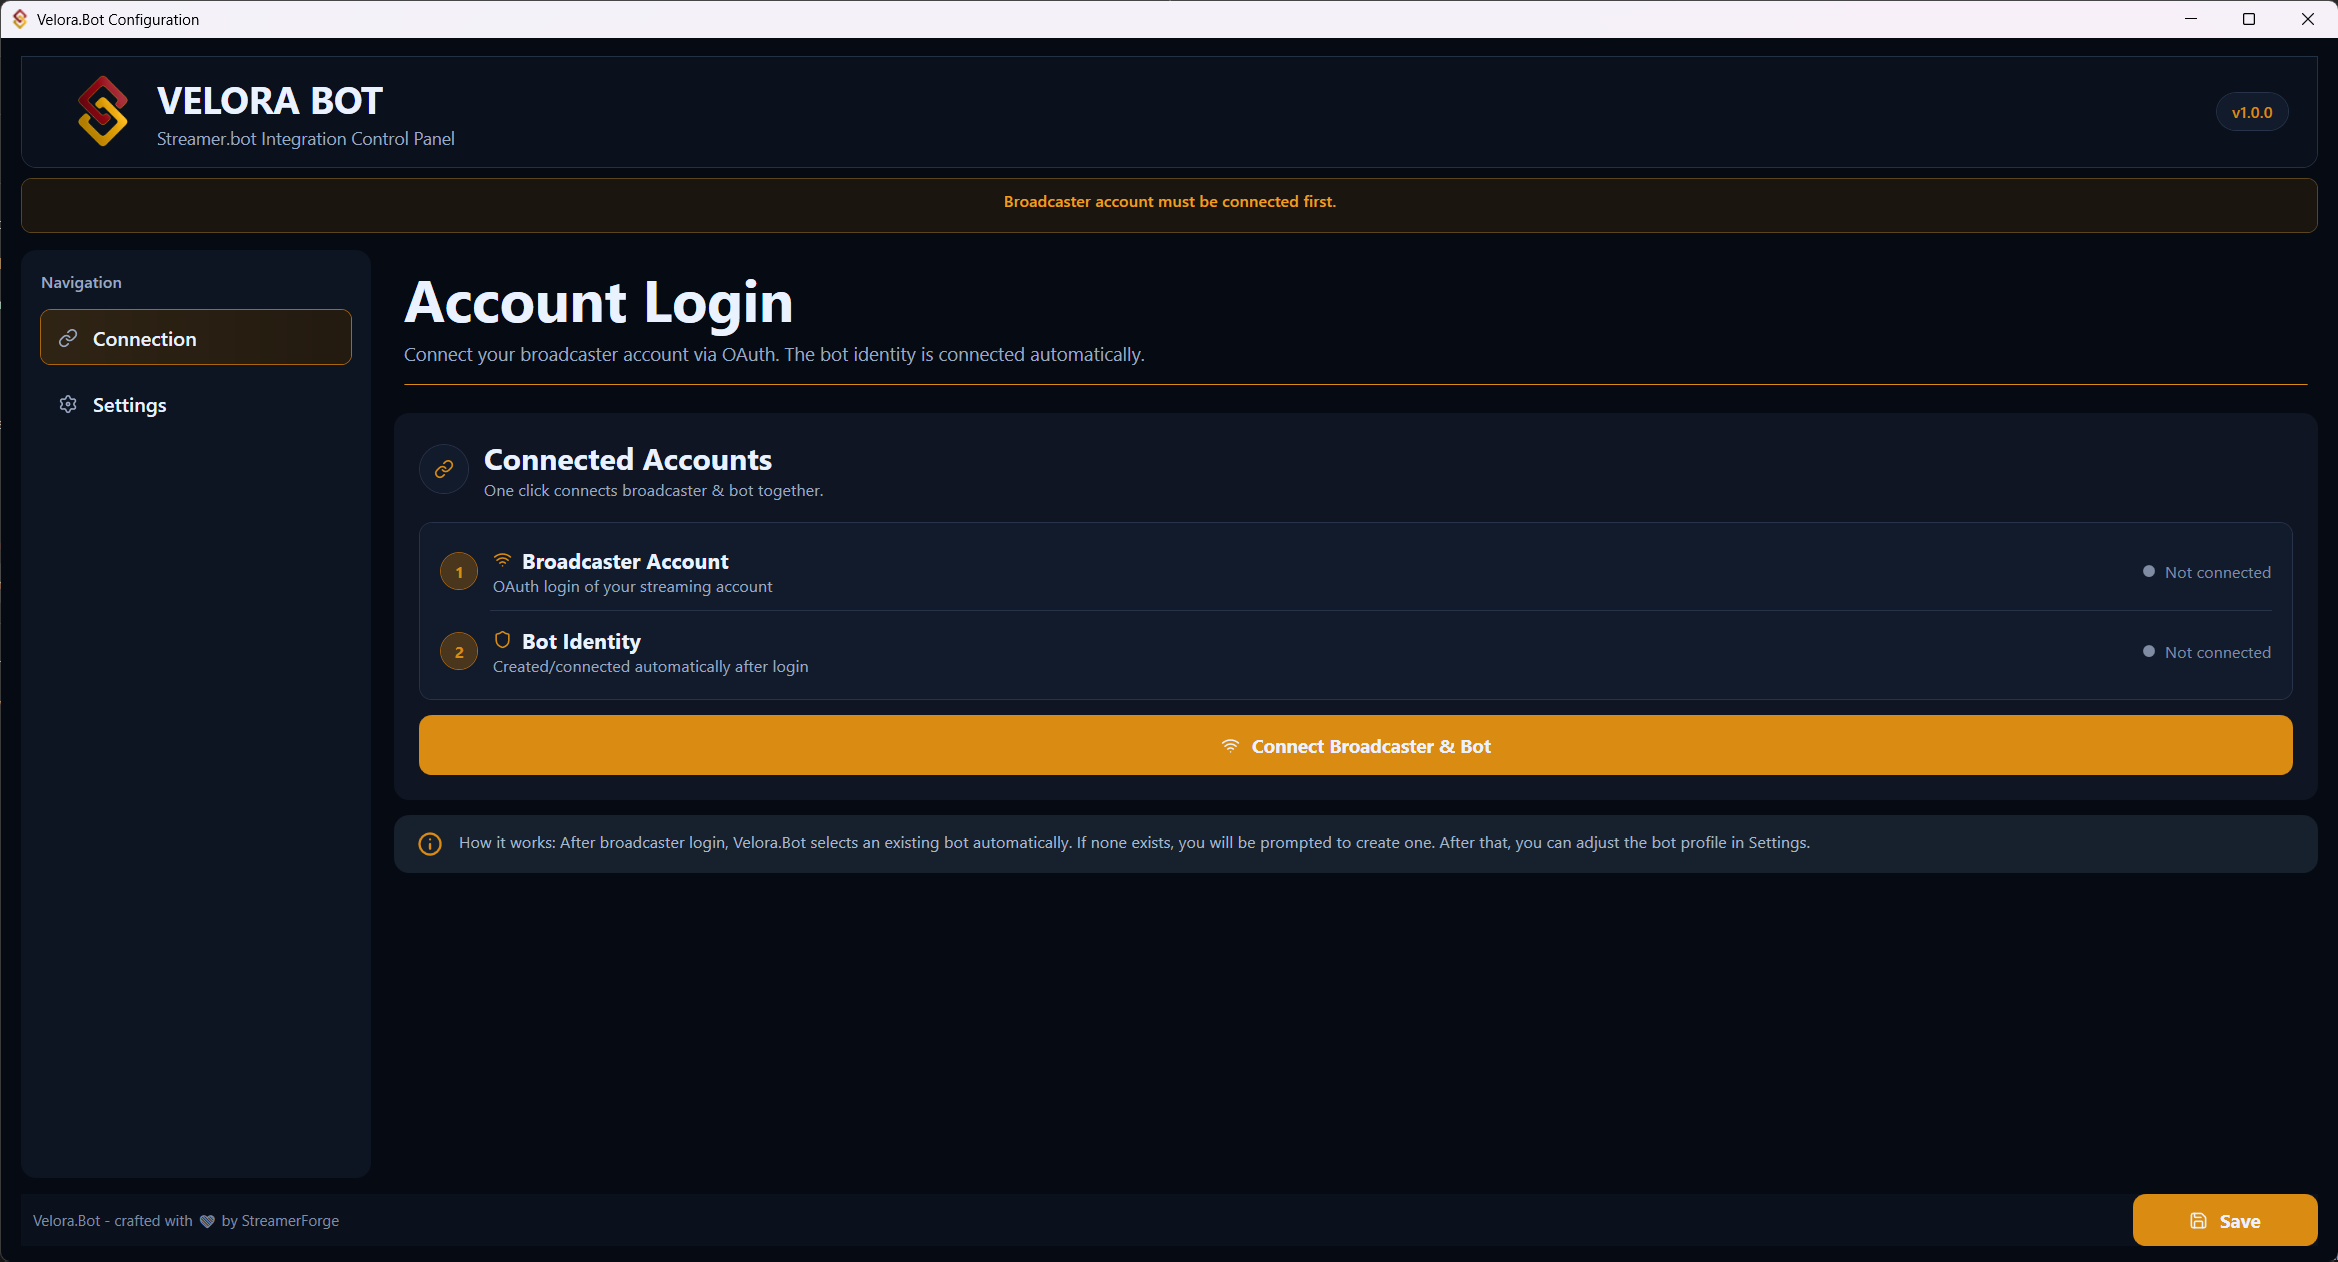
- Click Connect Broadcaster & Bot.
-
A website opens in your browser - scroll down and click authorize.
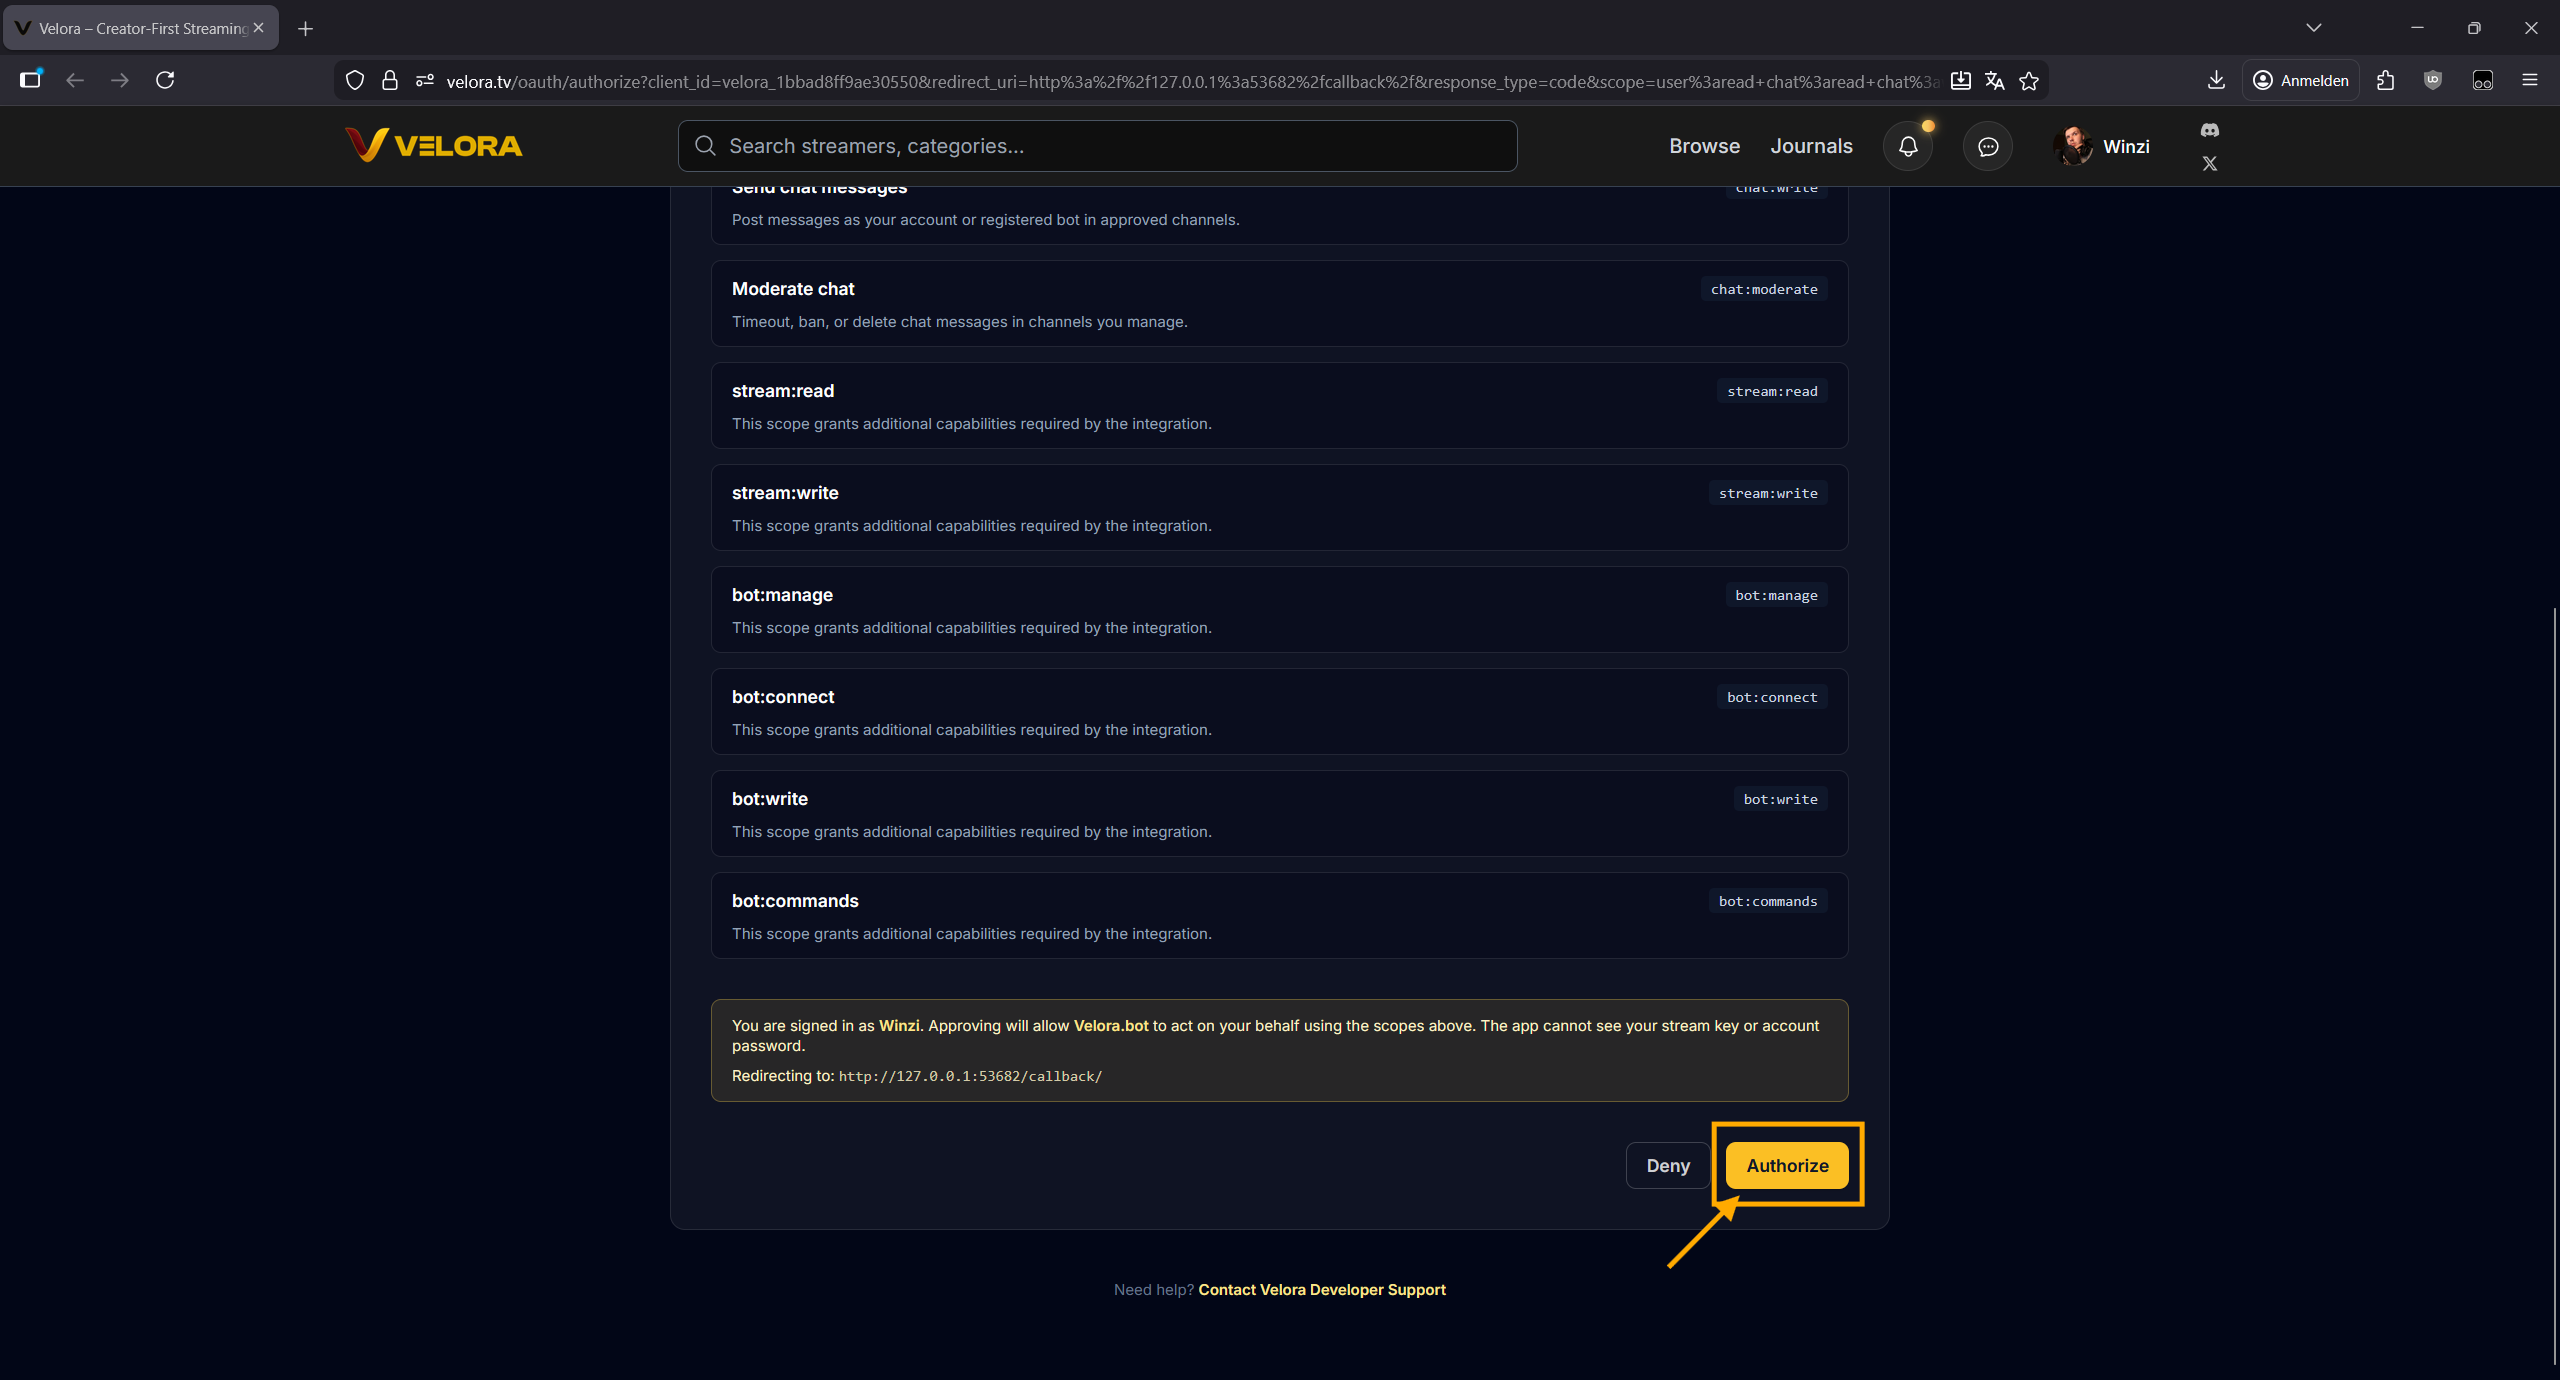
- Close the website.
-
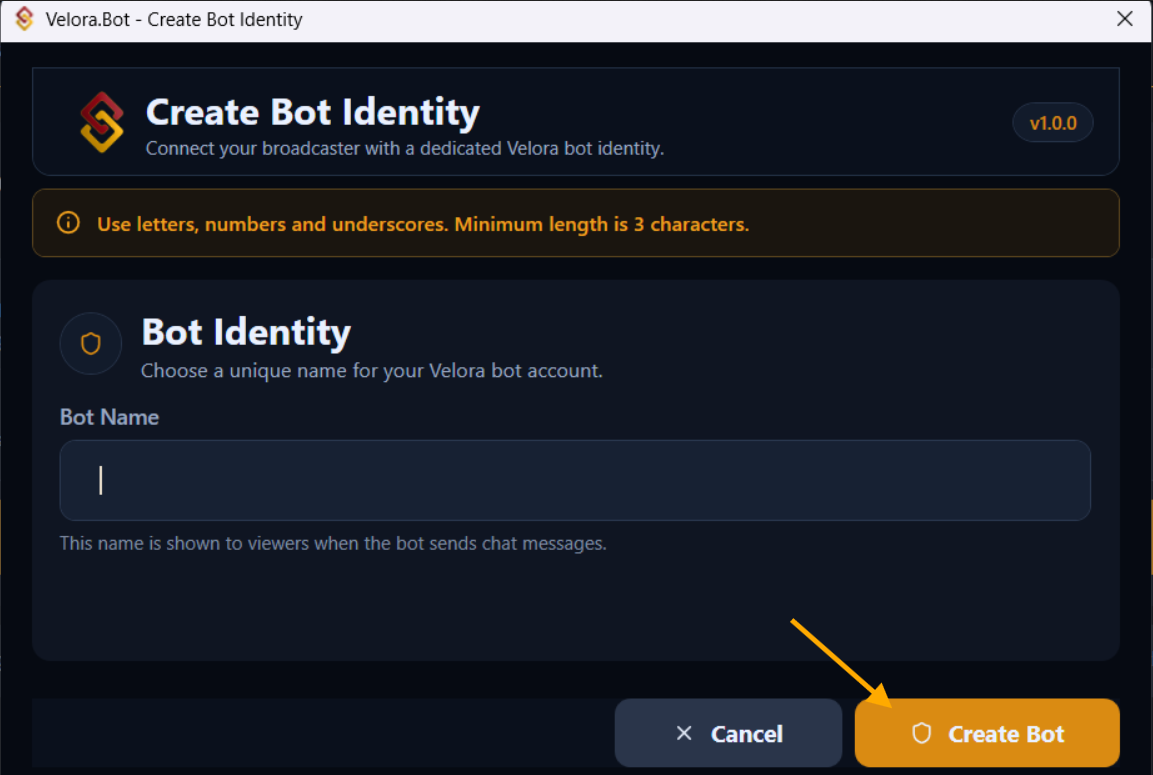
If you do not have a bot account yet, you will be asked for a name - enter one and confirm with Create Bot.
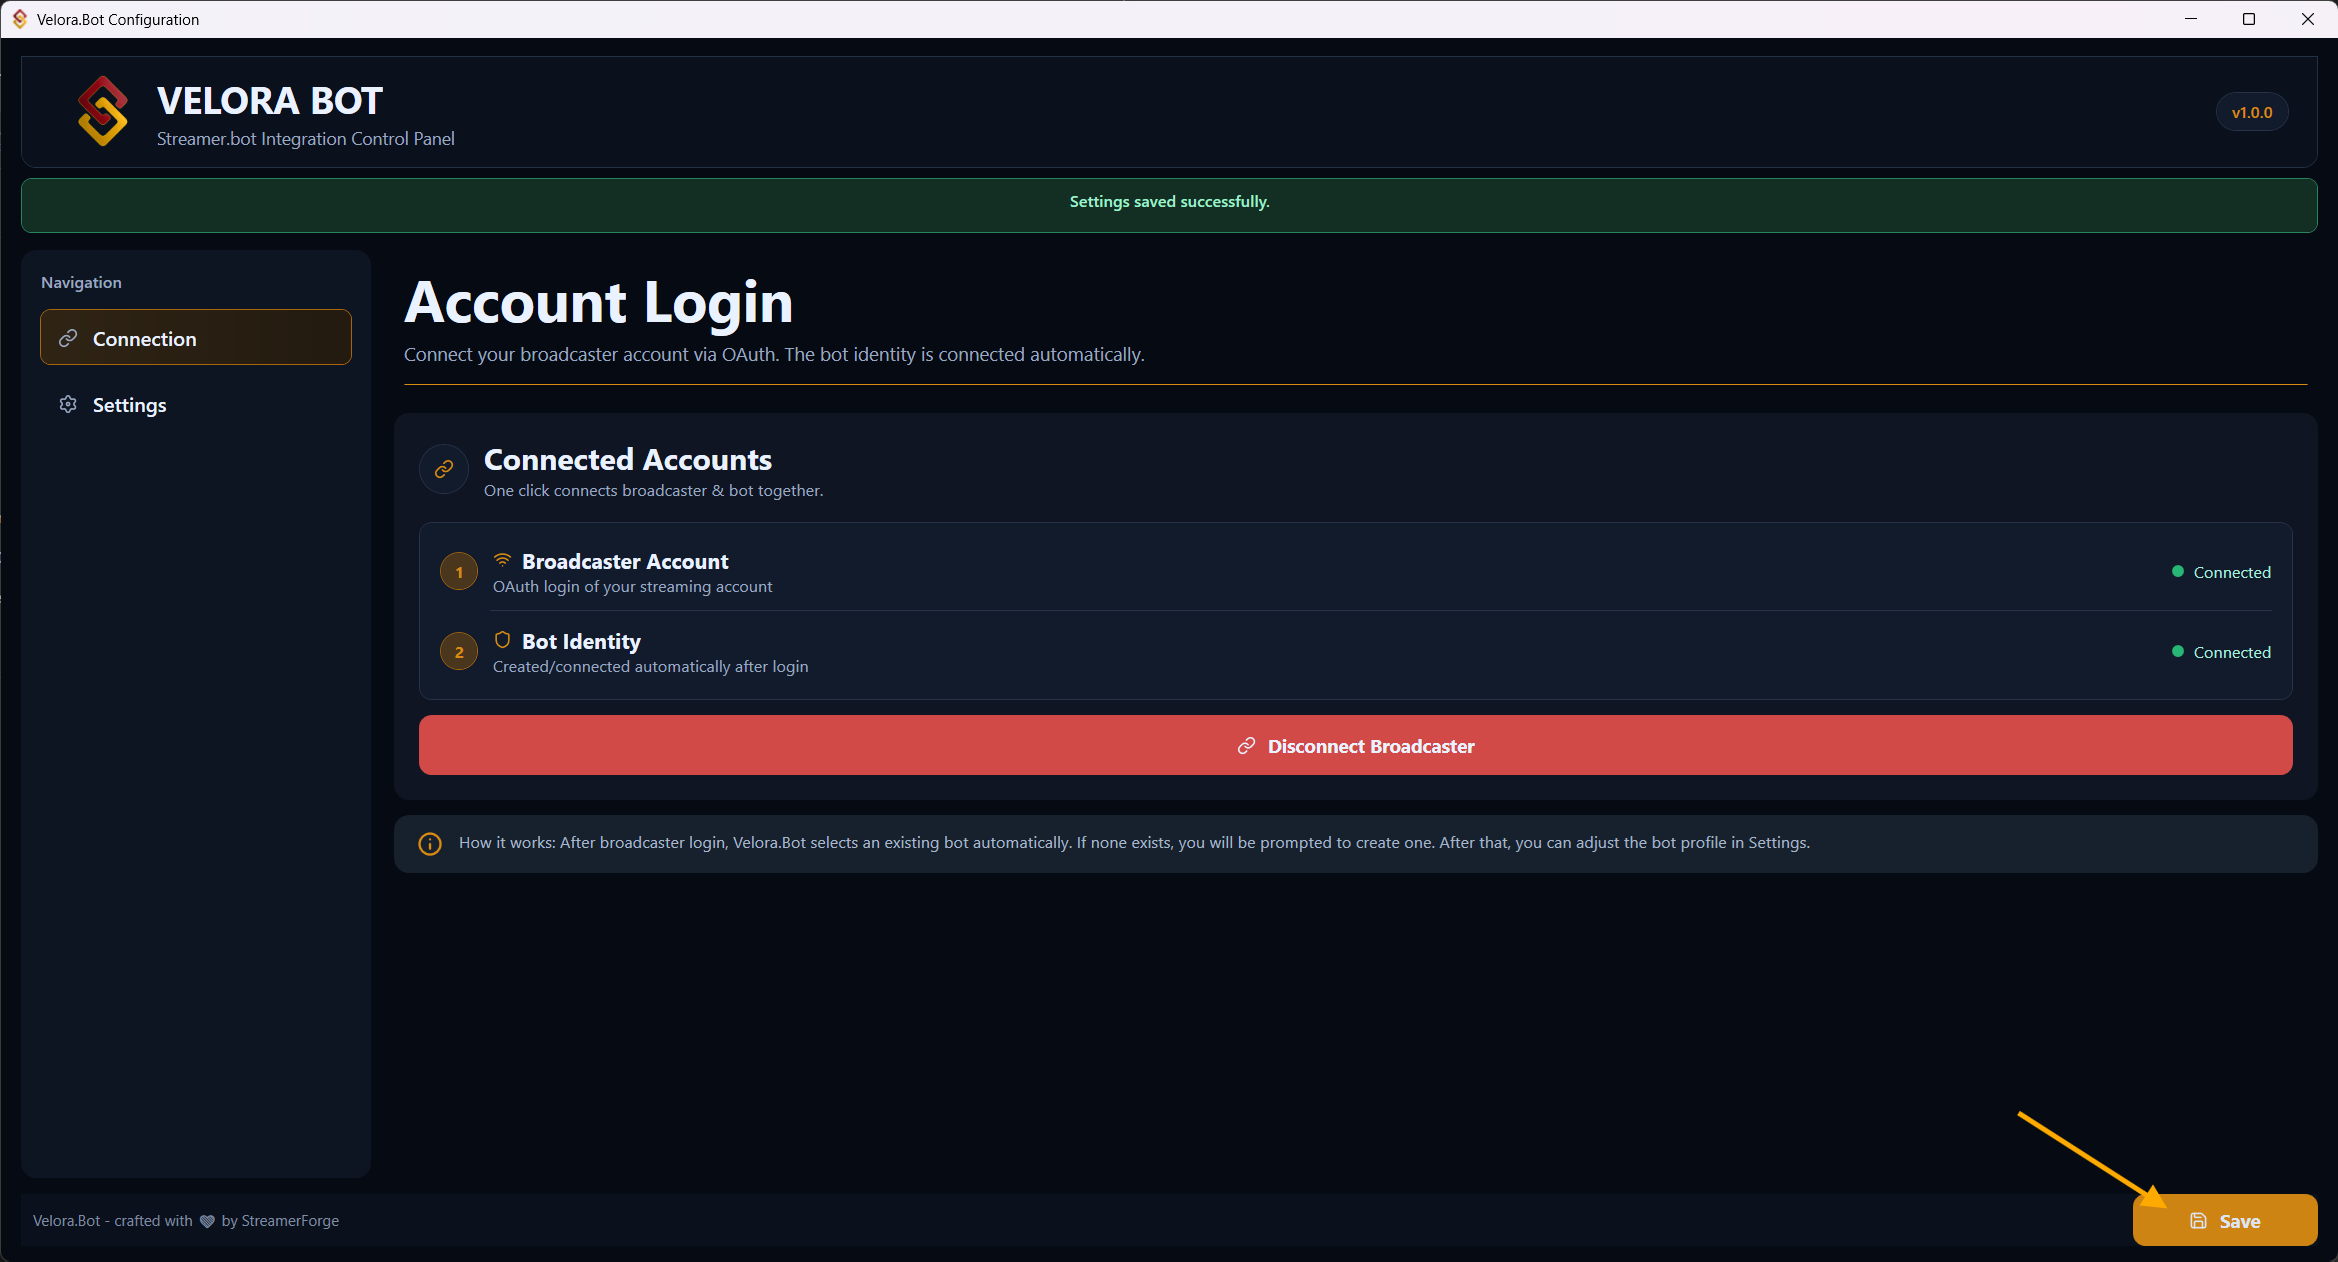
- The bot is created automatically and you get a green success message that your accounts are now connected.
- In the UI, the right side shows the status of both accounts.
- Optional: set a profile picture for the bot in settings or rename the bot.
-
Then click Save.
-
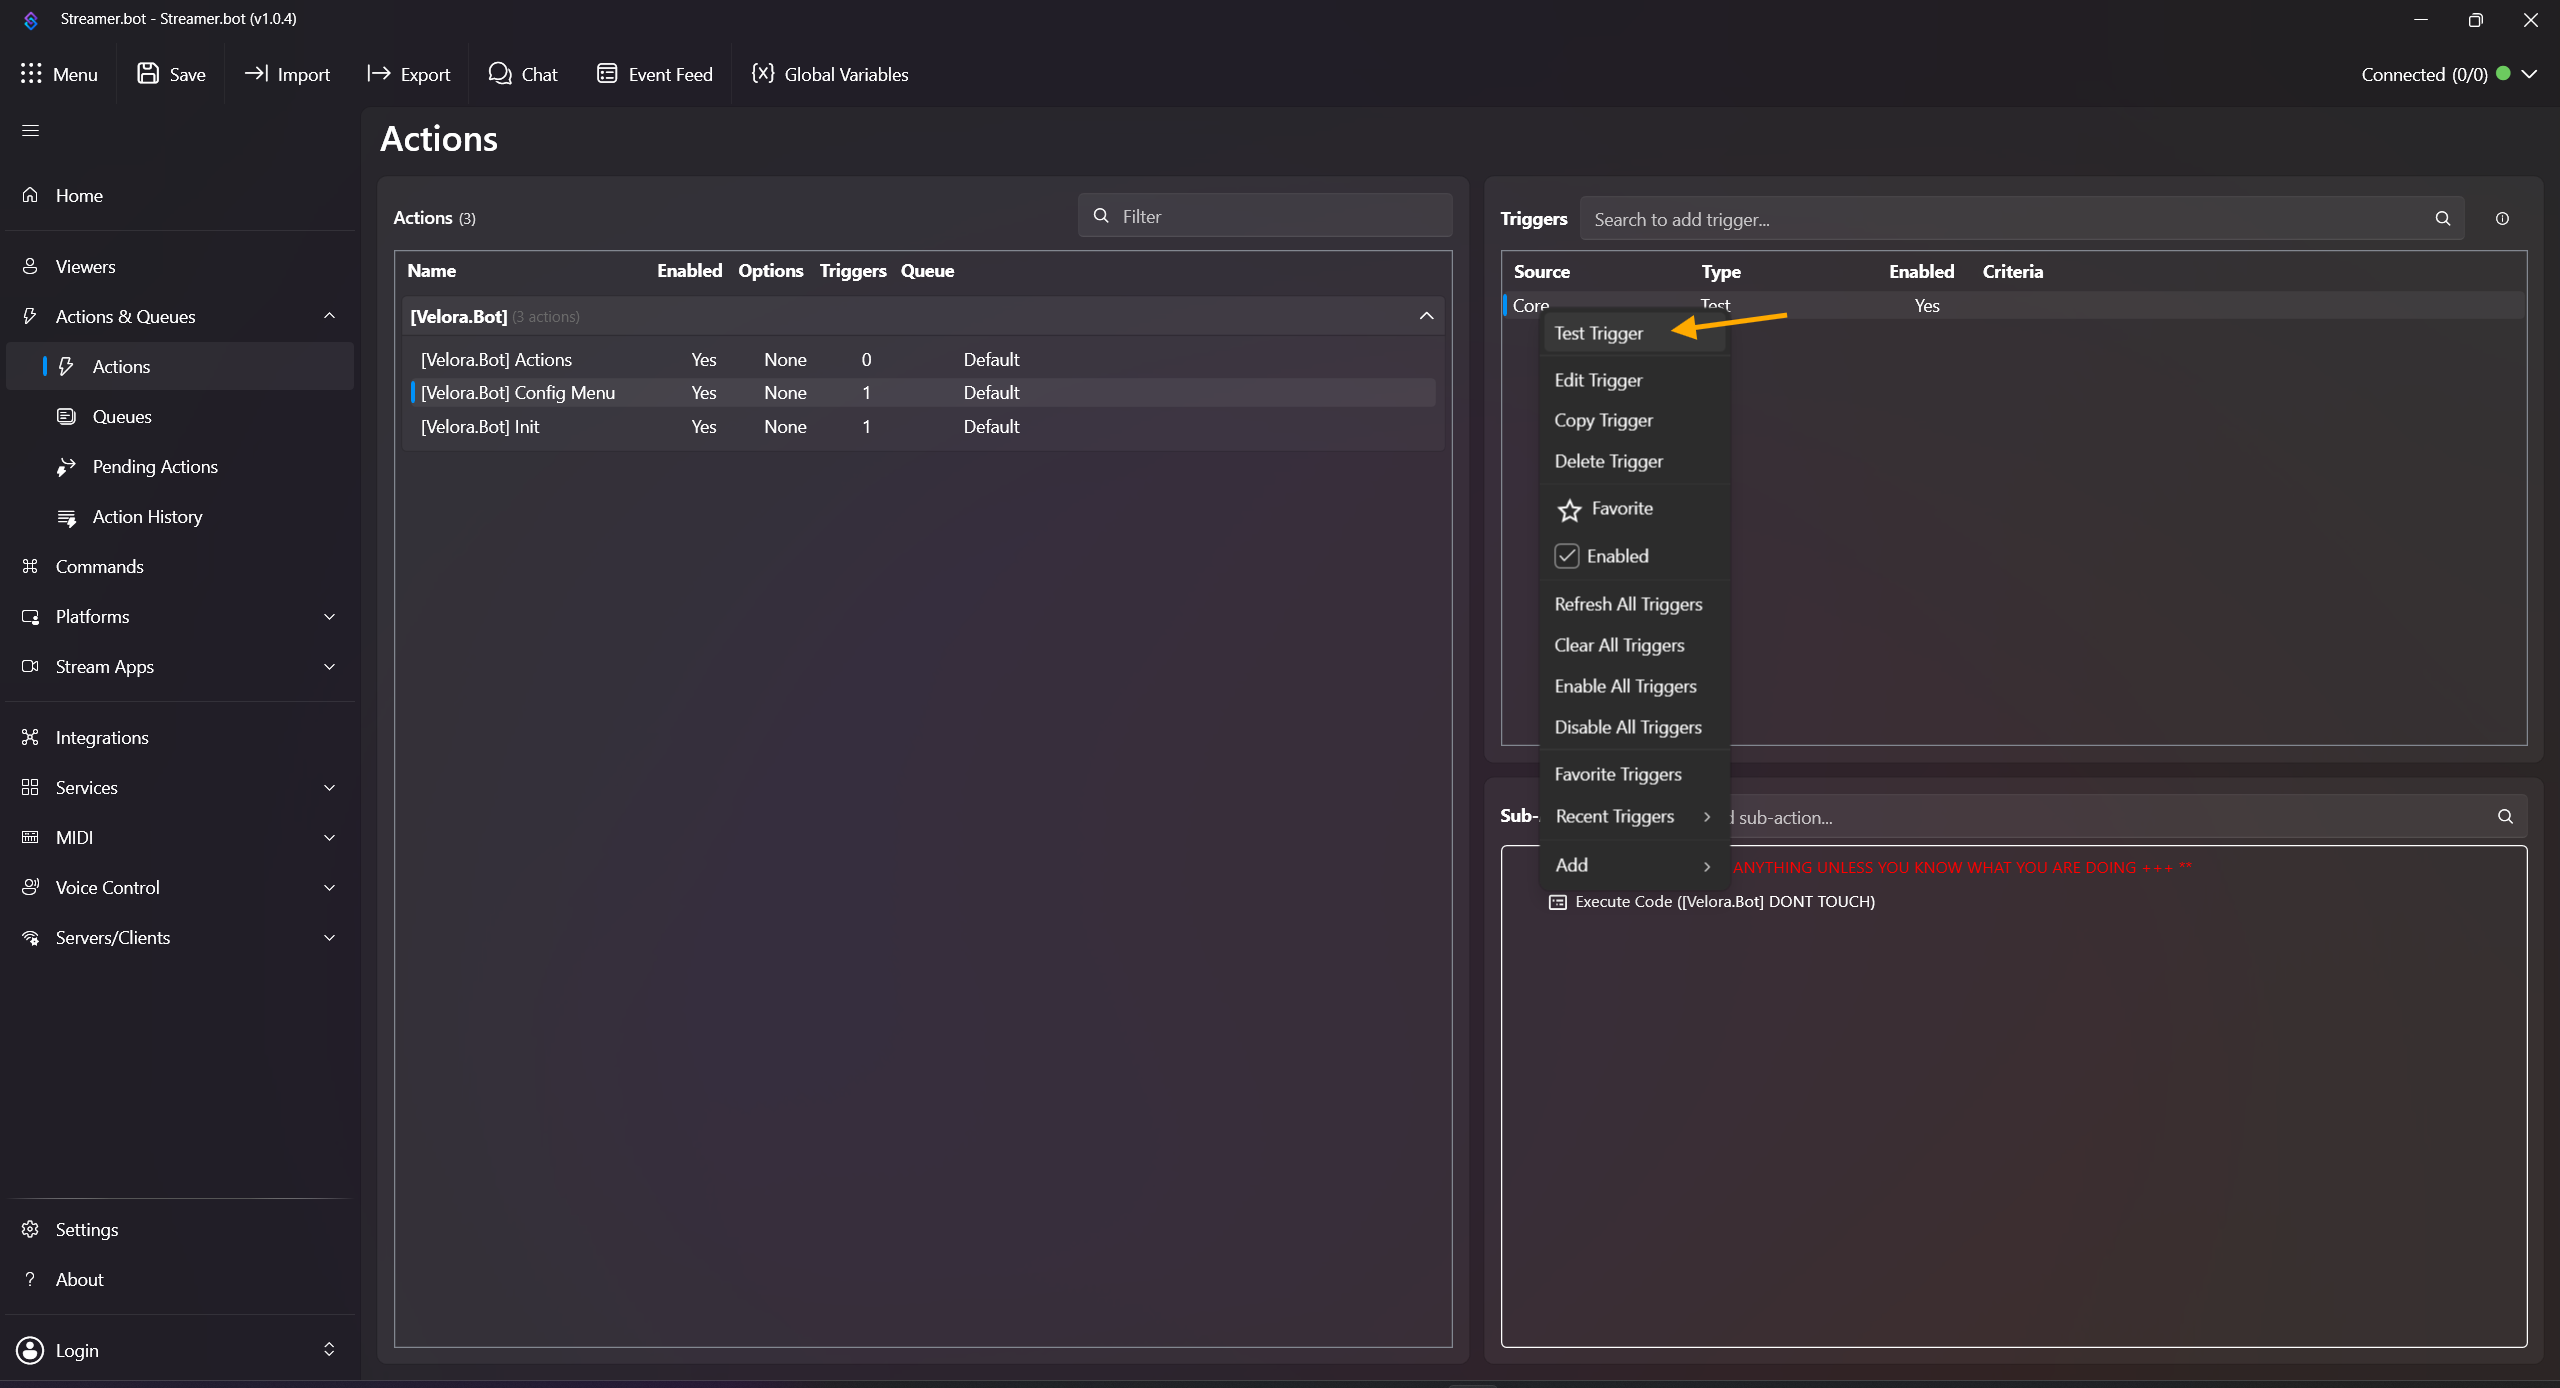
Close the window - now you can start creating your first actions. If you need the config menu again, click the action [Velora.Bot] Config Menu, right-click the trigger, then click Test Trigger.
Info: Bot names can contain letters, numbers, and underscores, and must be at least 3 characters long. Hyphens - are automatically converted to underscores _.
Ready to Start
After connecting, you can directly start using triggers and subactions, for example follow alerts, chat commands, or reward redemptions.
Need practical examples? Open Tutorial.
Have fun!
Your StreamerForge Team
If you run into issues you cannot solve, open a ticket in our Discord or message us in the Velora Discord in #velorabot-sb-help.